Sonarqube provides a way to analyse our code and find code quality issues with static code analysis. Running Sonarqube helps a developer to write better code and so we must run sonar analysis as frequently as possible.
However that is easier said than done. The reason for that is that in most organisations we have sonarqube servers and as a developer we have to run our analysis using that central server.
This makes following the recommendation of running code analysis on a frequent basis a little tricky. As a developer we love to code on a local machine and if anything which need us to be connected get somewhat lost in the long run.
To avoid all such issues I tried to set up sonarqube locally and configure my build to run against the local server. Following the below steps will help you in running sonar analysis as easily as doing a “gradle sonarqube“
The first step of the step up is to run sonarqube locally so that we are not dependent on some server. To make things simpler and more organised, we will be using “Docker” to run sonarqube. To start a Sonarqube Docker container run the below command.
docker run -d --name sonarqube -p 9000:9000 sonarqubeOnce sonarqube is started, enter http://localhost:9000 into your browser and login into sonarqube using “admin” as your username and password.
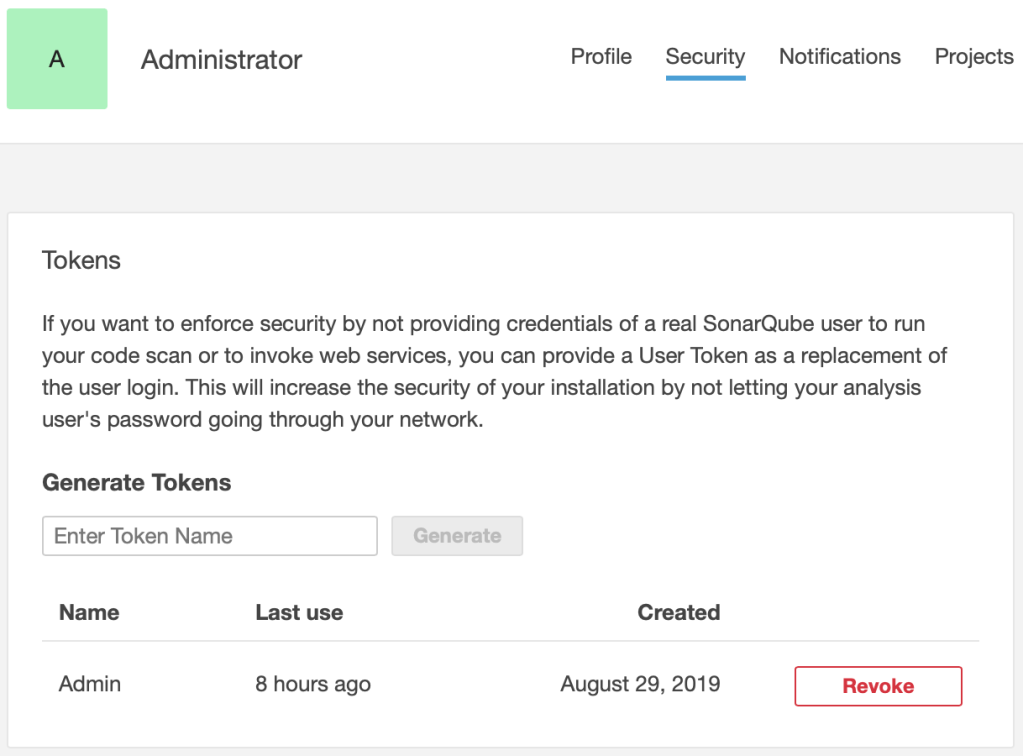
Once you have logged in, go to the user profile section of the administrator user by clicking on the right hand side of the header. Please refer the below image for more details.

Click on the security section and then create a new token.
Once this is done copy the token and add that into your gradle.properties along with the below section. This tells gradle the network details of the local sonarqube server and the credentials to login into the same.
# gradle.properties
systemProp.sonar.host.url=http://localhost:9000

#----- Token generated from an account with 'publish analysis' permission
systemProp.sonar.login=<token>
As the last step enable sonarqube plugin into your build.gradle file
plugins {
  id "org.sonarqube" version "2.7"
}
Awesome! if you have followed me correctly till this point then you are all done. Execute the below command and once it is completed refresh your sonarqube page and see the results.
gradle sonarqube